They taught us a lot of things in vet school. We spent the first year just studying anatomy and physiology—the thought being if you don’t know what “right” looks like, you can’t know what “wrong” is. It didn’t seem real important at the time. We were all eager to get into surgery or complicated internal medical cases where we could save lives and stamp out pestilence—or at least distract it a bit. As it turned out, knowing anatomy and physiology is essential. Of all the anatomy I learned in those formative years the structure of the horse hoof seemed the simplest. It isn’t.
The advent of modern imaging techniques like “computer aided tomography” (CAT Scan), “magnetic resonance imaging” (MRI) and ultrasound has shown us structures in the foot of the horse that were previously unknown. It is not necessary to be a world-class anatomist to understand some basics about hoof growth. However, it is important to know what a “normal” foot looks like. In addition, a rudimentary knowledge of hoof physiology will help us understand how it grows and what we can do to maintain healthy growth. Since foot problems are the primary source of lameness, keeping them healthy is the most important thing we can do for our horses.
The actual mechanism of hoof growth is extremely complicated, and some of the details are yet to be understood. However, the practical concepts are pretty simple: growth is dictated by blood flow, blood flow is directed by the pressure the weight of the horse applies while standing or in motion. The foot should land flat. This allows blood to flow evenly around the hoof and this is why balance is imperative. A good illustration of this can be found on our own finger nail. Press on the nail (up or down) and watch how the color changes in the nail bed. This is how pressure alters blood flow. Too much pressure at the toe, for example, restricts blood flow and, therefore, impairs growth.
One way to see if the foot is landing flat employs the use of a felt-tipped marker. Trim the foot to what we think is “flat”. Then mark the trimmed or rasped area. (A bright color is best). Walk the horse on pavement for about a minute and check the bottom of the foot. If the color is worn off evenly, the foot is landing flat. If not, rasp the area retaining color and re-mark all of the rasped area and repeat the process until the color is worn evenly.

Figure 1. The foot should be symmetrical,
frog in the center, heels as wide at the
foot at the apex of the frog (black bars)
The bottom of a fairly normal foot is shown in figure 1. The heel should always be trimmed back to the widest point of the frog. The frog should be in the center of the foot, and the width of the foot at the apex, or point, of the frog should be about as wide as it is at the heels. Although this is not always possible, this is the ideal and should be the goal in mind every time we trim the foot.
When viewed from the side, (Figure 2) the angle the toe strikes the ground should be identical to that of the heel (arrows). If the angle of the heel is more acute than that of the toe (Figure 3) the heels are underrun and/or collapsed. This will occur gradually over time and can be very difficult if not impossible to correct. It is much easier to keep things right than it is to make things right. (Figure 3)
Figure 2. The angle that the heels and
toes strike the ground should equal.
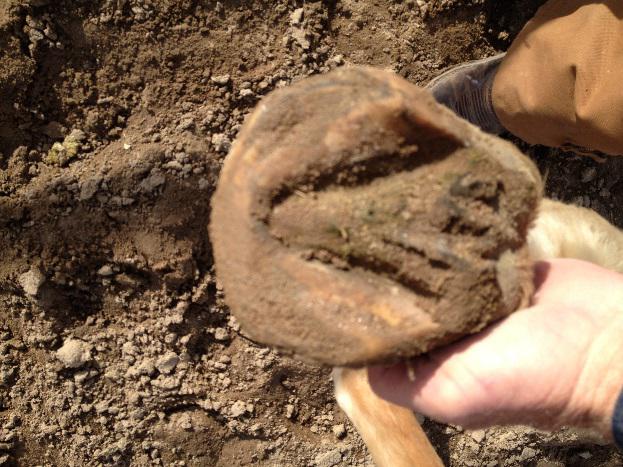
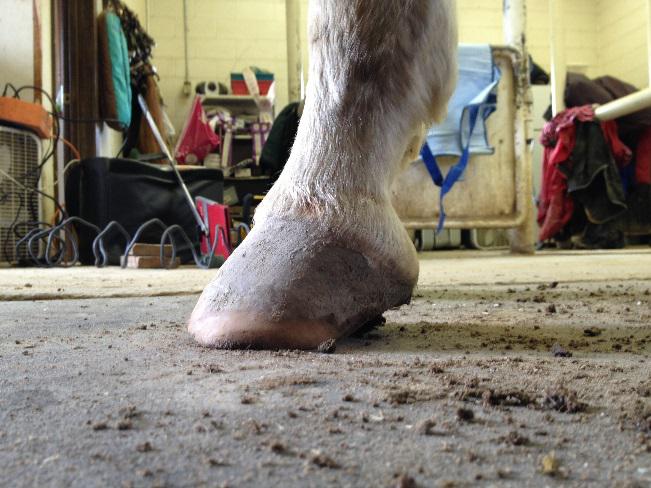
Figure 3. An “underrun heel” (left). The heel angle is lower than the toe. Heels should be trimmed to the widest part of the frog (right). Note the black line, where the heels are, versus the amber line, where the heels should be.The term “balance” is frequently encountered in discussions of hoof care. Unfortunately, it is one of those terms that is not often well-defined. Although the external appearance of the hoof structure commonly reflects the internal anatomy, sometimes some significant pathology lurks beneath the surface. For this reason, a good quality digital radiograph (X-ray) can be a great tool to help the farrier look on the inside of the foot. A radiograph of both front feet should be taken every year. A single, lateral view (one taken from the side) is not expensive and can serve as an early warning for potential problems. Figure 4 demonstrates some changes in the bone commonly seen after laminitis. The hoof wall is not parallel with the coffin bone (arrows). This is not always visible from the outside and if it is not addressed, serious problems can develop.
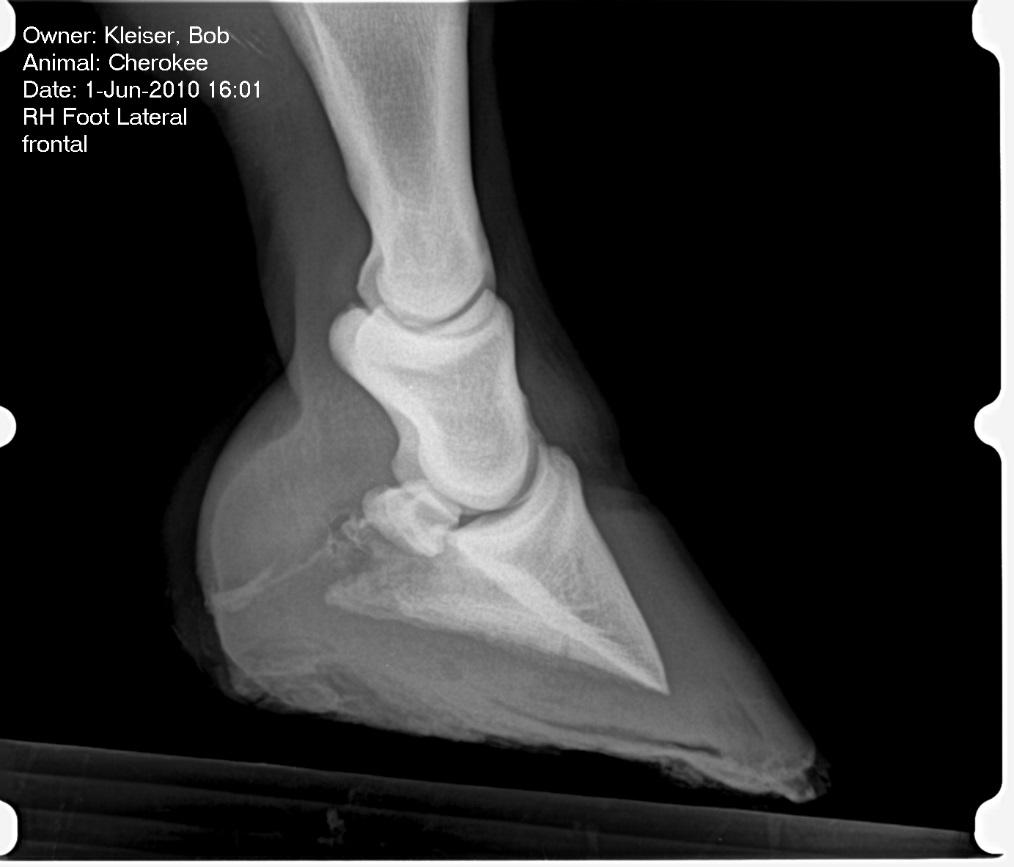
Figure 4. The hoof wall (green arrow) is not parallel
with the coffin bone (black arrow). This is “rotation” or
“founder” seen after a case of laminitis.
For the hind feet, the external landmarks for good balance are similar to that of the front, but we have an extra guide to add to our tool box. The line made by the coronet of the hind feet, when viewed from the side should point to the front limb below the knee (see figure 5). Though problems in the front feet are most common, the hind feet should be kept in good balance, as correcting them can be just as challenging.
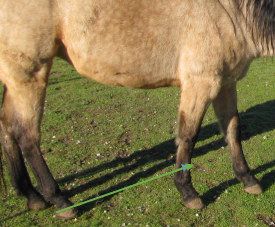
Figure 5. The line from the left coronet indicates reasonable balance (green arrow), the right is poorly balanced (black arrow)
